This is the multi-page printable view of this section. Click here to print.
Swift Guides
1 - Swift getting started
Overview
Swift is Elastx object storage in OpenStack. Swift provides high availability by utilizing all availability zones and is encrypted at rest. This guide will help you get started with the basics surrounding Swift object storage.
Swift/S3 Compatibility
Swift has an s3 compatible API for applications that don’t natively support the Swift API.
Getting started with Swift CLI
Prerequisites
- python-swiftclient installed.
- Application credential. See here on how to get started with application crendentials.
Swift-cli
Start by sourcing your application credential.
Creating containers and uploading objects
Start by creating a new container:
$ swift post my_container
Upload a file to your container:
$ swift upload my_container ./file1.txt
List containers and objects
To list all containers in your project:
$ swift list
my_container
my_container2
List all objects from a specific container:
$ swift list my_container
file1.txt
Show statistics of your containers and objects
With the stat option, you can get statistics ranging from specific objects to your entire account. To list statistics of a container:
$ swift stat my_container
Account: AUTH_7bf53f20d4a2523a8045c42ae505acx
             Container: my_container
               Objects: 1
                 Bytes: 7
              Read ACL:
             Write ACL:
               Sync To:
              Sync Key:
          Content-Type: application/json; charset=utf-8
           X-Timestamp: 1675242117.33639
         Last-Modified: Wed, 01 Feb 2023 09:15:39 GMT
         Accept-Ranges: bytes
      X-Storage-Policy: hdd3
            X-Trans-Id: tx2f1e73d3b29a4aba99c1b-0063da2e2b
X-Openstack-Request-Id: tx2f1e73d3b29a4aba99c1b-0063da2e2b
            Connection: close
Download objects
You can download single objects or all objects from a specific container or account.
Download a specific object:
$ swift download my_container file1.txt -o ./file1.txt
Download all objects from a specific container:
$ swift download my_container -D </path/to/directory/>
Download all objects from your account:
Beware: If you have a large amounts of objects, this can take some time.
$ swift download --all -D </path/to/directory/>
Delete containers and objects
WARNING: The delete option will execute immediately without any confirmation. This action is irreversible.
Delete specific object from a specified container.
$ swift delete my_container file1.txt
Delete a container with all of its objects.
$ swift delete my_container
Getting started with Swift in Horizon
With Openstacks Horizon you can get a good overview over your object storage. There are limitations in Swifts functionality when using Horizon, to fully take advantage of Swifts functions we recommend you to use the swift cli.
This guide will show you the basics with using Swift object storage in Horizon.
Create your first container
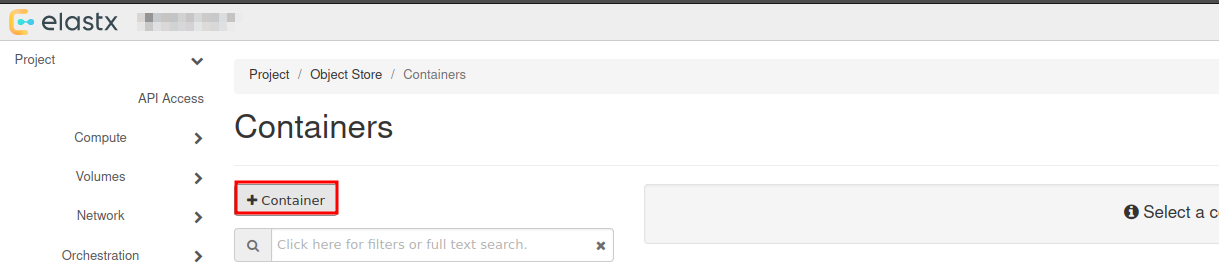
Navigate to “Project” → “Object Store” → “Containers”
Here you will see all the containers in your object storage.
Choose +Container to create a new container:
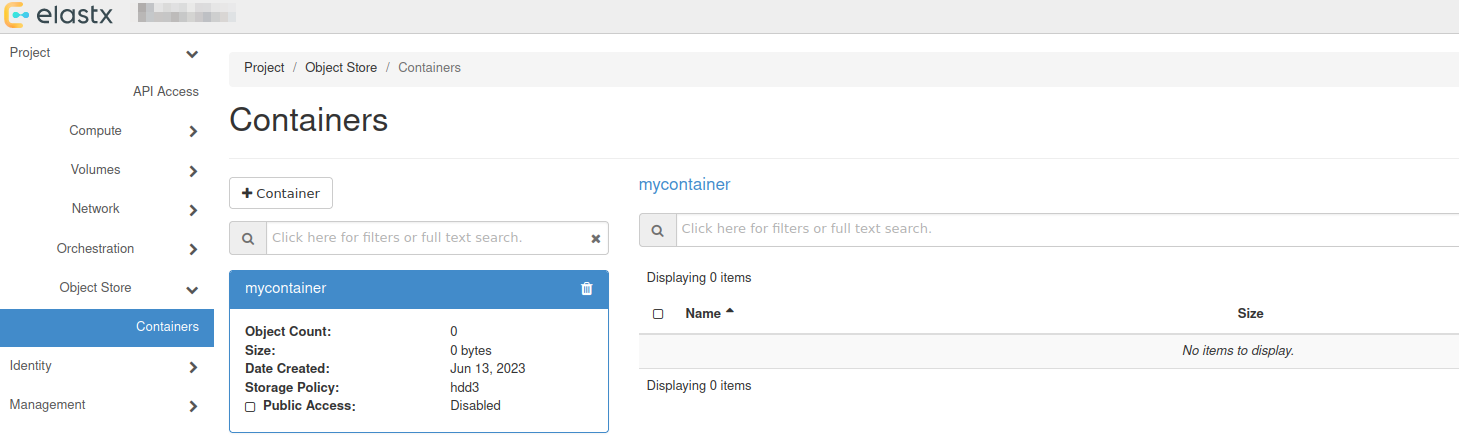
Choose a name for your new container:

You will se that a new container has been added, which date it was created and that it is empty.
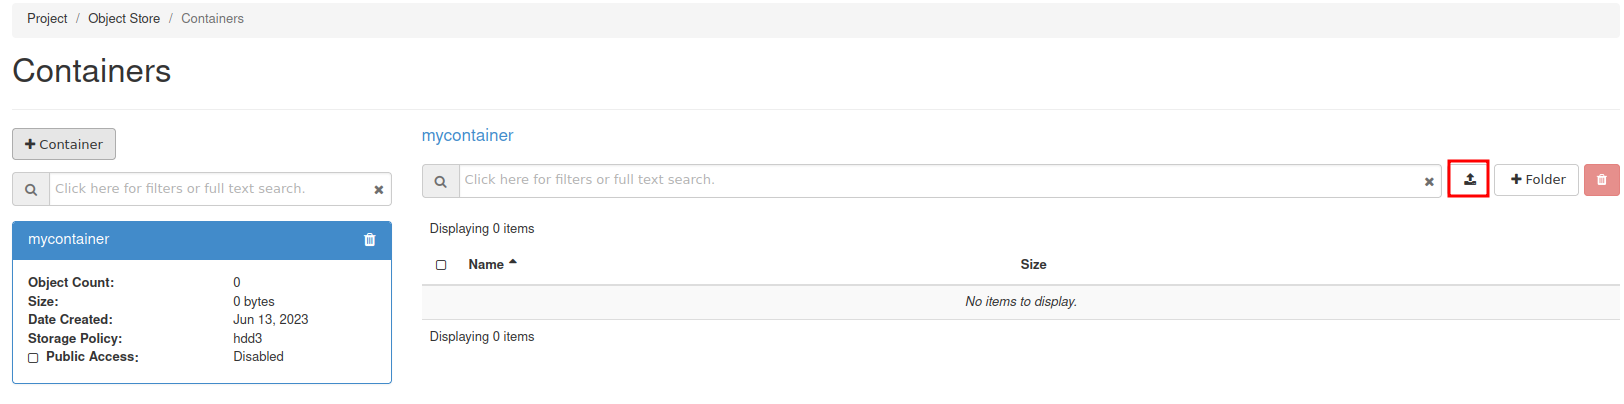
Upload your first file
To upload your first file, press the up arrow next to +Folder:
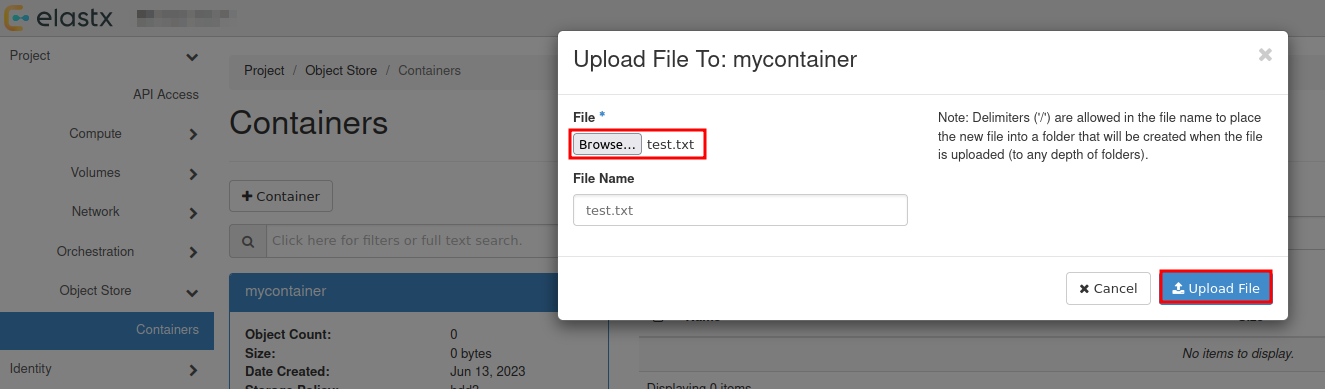
Select the the file you want to upload:
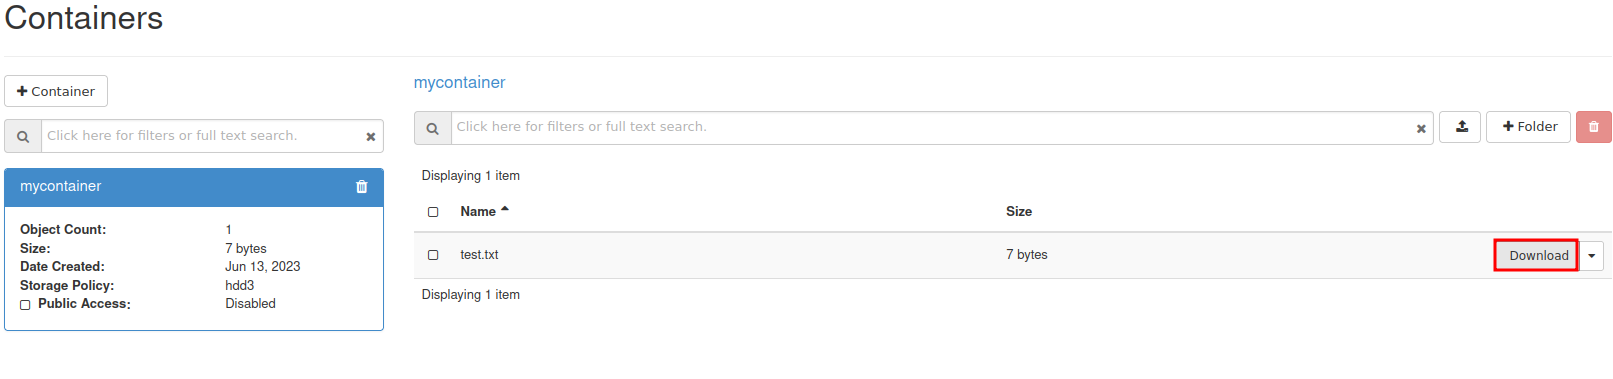
Download file
To download a file, select your container and press Download next to the object.
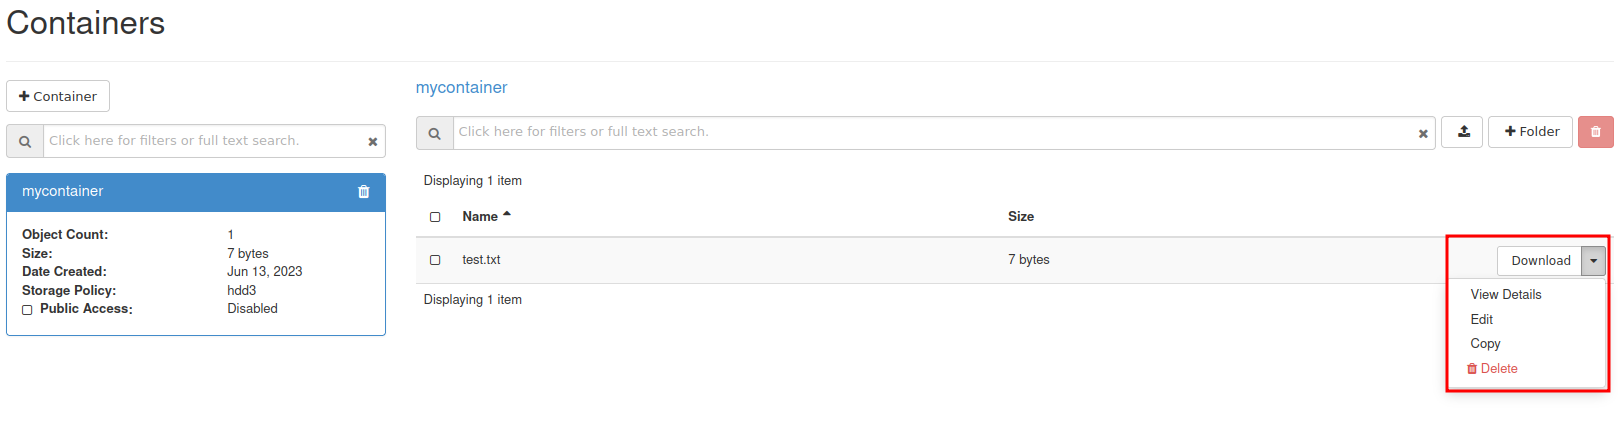
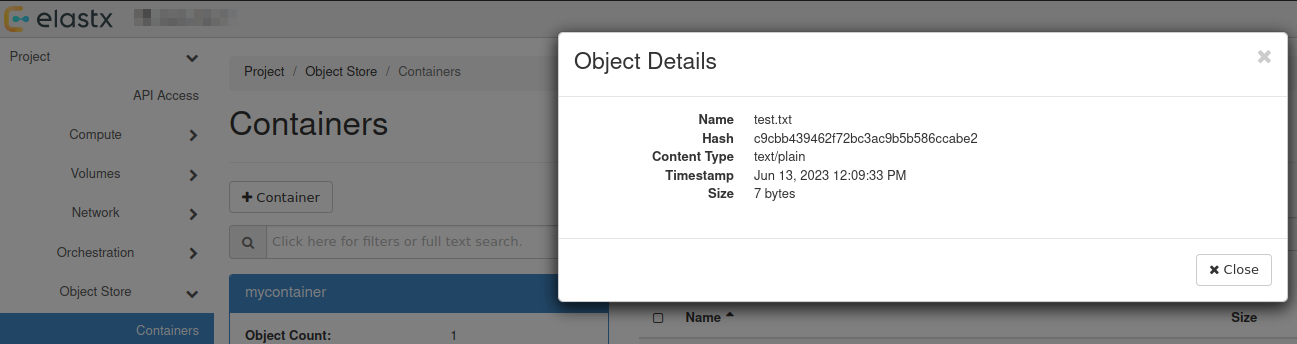
View details of an object
You can view details of an object such as Name, Hash, Content Type, Timestamp and Size.
Select the down arrow next to Download for the object you want to inspect and choose View Details:
Further reading
- For more advanced features, see the official OpenStack documenation
- Rclone has native support for Swift. You can read more about Rclone’s support for Swift here.
2 - Swift projects
Overview
There are two main options for access separation in Swift:
- You can use Access rules to manage access to specific containers using application credentials. This alone will not stop the ability for users to create/remove virtual machines. See more information here on how to get started with access rules.
- Dedicated Swift project. Dedicated Swift projects are basically OpenStack projects with reduced access to any resource except swift. This is sometime needed due to the current limitation of how privilege/role management works for users in OpenStack.
Swift Project
In this guide we will go through how to manage user permissions for Swift containers using ACLs in a Swift project.
The purpose of so called “Swift projects” ("
The Swift project can be used in two ways - to store/manage Swift containers and/or manage Swift-only users.
How to manage permissions via ACLs
If you want a user to be able to create, manage and upload/download objects for any Swift containers created in the Swift project, inviting and assigning the user the role “Object Store” (known as “swiftoperator” in the API/CLI) in “Management” -> “Access Control” -> “Project Users” should be sufficient.
If you instead want a user to be able to read and/or write to a specific Swift containter created in the Swift project or any another project you have, you will need to invite the user to the Swift project, assign them the role “Project Member” and configure Swift container ACLs for the target container(s). We’ll go through an example below.
In order to configure Swift ACLs you will need:
- A user with the “Object Store” (“swiftoperator”) role in the project that contains the container you want to restrict/provide access to
- The Swift CLI or another API client capable of configuring ACLs (this is currently not supported through Horizon)
- An OpenStack RC file (openrc), “clouds.yml” or environment variables set for authenticating towards the API as the user used to configure ACLs
- Name of the container you want to configure ACLs for
- ID of the project in which the container is stored and the ID for the Swift project if they are not the same (listed under “Identity” -> “Projects” in Horizon or
openstack project listvia the CLI) - ID of the user you want to restrict/provide access for (accessible through “Identity” -> “Users” in Horizon as that user)
In the following example we’ll use the Swift CLI to configure read/write/list access to a specific container created in the Swift project
# Using variables here to make it easier to follow/adapt to new service users and Swift containers
$ SWIFT_PROJECT_ID="b71cd232c8544cf28a7d7aad797cafe9"
$ SWIFT_CONTAINER_NAME="test-container-1"
$ TARGET_USER_ID="whatever_id_it_has"

# Explicitly specifying project ID here, in-case you use an OpenRC/clouds.yml file downloaded from your other projects
$ OS_PROJECT_ID="${SWIFT_PROJECT_ID}" swift post "${SWIFT_CONTAINER_NAME}" --read-acl ".rlistings,${SWIFT_PROJECT_ID}:${TARGET_USER_ID}" --write-acl "${SWIFT_PROJECT_ID}:${TARGET_USER_ID}"
If you want to provide/restrict access to a container that has been created in another project, the process is similar:
# Specifying the ID for the other project instead
$ OS_PROJECT_ID="<project-id>" swift post "${SWIFT_CONTAINER_NAME}" --read-acl ".rlistings,${SWIFT_PROJECT_ID}:${TARGET_USER_ID}" --write-acl "${SWIFT_PROJECT_ID}:${TARGET_USER_ID}"
Note: Replace <project-id> with the actual Project ID
If you need any clarification, further guidance or have other questions, feel free to reach out to our support.
Known limitations
Currently, cross-project ACLs don’t work if you want to use the S3 compatibility.
Further reading
3 - Swift S3 compatibility
Overview
Swift provides an S3 compatible API for applications that don’t support the Swift API. Note that you need to create EC2 credentials for this to work.
NOTE: The S3 region must be set to “us-east-1” for compatibility with “AWS Signature Version 4”
NOTE: If the application does support Swift natively, using Swift will provide superior performance and generally a better experience.
Example s3cmd configuration
The configuration below works with s3cmd:
[default]
access_key = 00000000000000000000000000000
secret_key = 00000000000000000000000000000
host_base = swift.elastx.cloud
host_bucket = swift.elastx.cloud
use_https = True
bucket_location = us-east-1
Known Issues
The Swift S3 API has a known bug with sigv4-streaming and chunked uploads. We are aware of an upstream fix that has been merged - but we do not yet have it implemented on our platform.